My external hard drive for my MAC (my passport essential 3200bmv) was stolen and later recovered by the police. The criminal erased all of my data and used it on his own computer for his files on a PC (which the police erased before giving it back to me). But now I'm not able to save any of my MAC files on it. I can read whats left on the drive as police only erased the criminals pics etc. It looks as though he might have reformatted it to work with his PC?? I've googled this and can't find answers to figure out how to fix this and format it back to accept my MAC files.
Help please!!!
This answer explains how to format a drive in the exFAT or FAT32 file system. This allows the drive to be used on both Windows and macOS.*END A Western Digital external hard drive can be used on both Windows and macOS. This is useful if a drive is being used under both to move files between the two environments. Most WD Drives come formatted in the NTFS (Windows) or HFS+ (macOS) format. For a hard drive to be able to be read from and written to on both a Windows and macOS computer, it must be formatted to or file format. FAT32 has several limitations, including a 4 GB per-file limit.
This is a file system limitation that affects both macOS's and Window's, and the only workaround is to format the drive to exFAT. For more information about what these limitations are please see.
The easiest way to format the drive to or is by using macOS's built-in Disk Utility for FAT32, or both macOS and Windows' built-in tools, Disk Utility or Disk Management respectively for exFAT. Critical: Never attempt to connect any external drive to multiple computers at the same time. This could quickly damage the drive's partition and corrupt the data on the drive. ExFAT in macOS 10.11 (El Capitan) and above There are two easy ways to format a drive to use is by using macOS's built-in Disk Utility; using Erase (Step 4) or Partition (Step 7). For instructions on how to do this, please see the instructions below: • Connect the WD drive to the Mac computer. • Double left-click on the Mac HD, the internal Mac hard drive visible on the top-right corner of the desktop screen.
Accidentally Format WD My Passport External Hard Drive 'I accidentally formatted WD my passport HFS+ external hard drive and erased all data on this disk drive. I have tried several data recovery programs, but they failed to search all lost files and couldnt perform the hard drive recovery. Feb 14, 2017 - Of course, there are more than two methods that can help you format a WD My Passport portable hard drive under Mac OS. However, all of the.
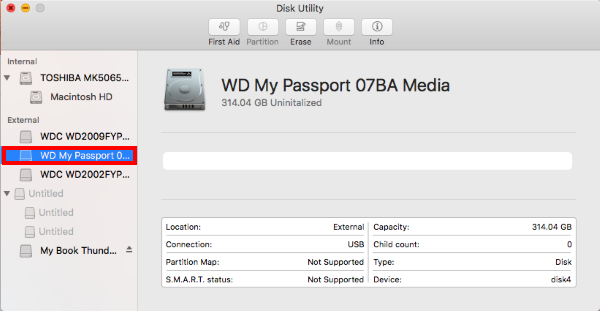
Choose Applications from the left-side panel. From the Applications folder, open Utilities, and lastly double-click on Disk Utility. • Disk Utility will now be open. From the left-side pane, choose the drive that is to be re-formatted. Typically there are two listings for each drive unless more than one partition exists on a particular drive. Choose the drive listing that is farthest to the left (Not indented) for the drive to be formatted. It is usually directly above the name of the drive.
In the example below, the one to be selected would be WD Elements SE. Erase• After selecting the appropriate drive, additional option buttons will become available on the top part of the Disk Utility window. Click on Erase. • The Erase dialog window will now appear.
Assign the name that will be given to the drive. How to tizen emulator in mac os x with intel haxm. • Select the Format (file system) from the drop-down menu.
For this article, we chose exFAT, see image below. • Select the Scheme (Partition Table Scheme) from the drop-down menu. See image below. Note: Only legacy macOS systems, using non-Intel CPU's, will utilize the Apple Partition Map. It is best to use Master Boot Record only for MS DOS format. All Intel-based macOS computers and drives larger than 2 Terabytes should use the GUID Partition Map.
• Click Erase to begin the format process. • When the Erasing process is completed, click on Done. Partition• Click on Partition on the top menu of the Disk Utility window. • The Partition window will now appear. Click next to Format to display a drop-down menu, and select exFAT. This is the format that the drive will be formatted to. • Confirm that the name of the drive is correct in the Partition area, and update it if necessary.